Wednesday, August 29, 2012

Vinyl floor installation

Note: Chronologically, this post and the first cabinets posts are out of order, as I forgot to publish this post, before I published the other one.  Oops!

Friday night, Sarah helped me wrestle the 12' long, 140lb roll of vinyl floor into kitchen.  Saturday morning, her dad came over, and the 3 of us managed to roll the floor out to its' final location.  Because it was not yet cut the size, it curled up the walls on 3 sides.  Carefully, methodically, and with a new sharp knife blade, I trimmed it section by section until, suddenly...  There was a floor.

Cat Not Included
For the seam, I tried the "double cut" method using my 4' level as a straightedge.  The idea was to lay the two pieces on top of each other, where the seam would be, and cut through both at the same time, so that the cuts would be perfectly lined up.  You make your cut through the grout line of the 2 pieces, and it should all come out perfectly.  Unfortunately, the level was thick enough that I couldn't hold the knife vertical, and, well, it didn't come out so well.  I did it again, this time using my drywall T-square, and it came out much, much better.

For some reason, I was more apprehensive about rolling on the adhesive than I was about cutting the floor.  Illogical, because the adhesive isn't permanent, and if I somehow messed up putting the floor down, you just pull it up and re-position it.

My father-in-law rolling on the adhesive
Thankfully, applying the floor adhesive to the underlayment was ridiculously easy.  I'm glad I got the roll-on adhesive, rather than the trowel-on kind.  We rolled 2/3 of the flooring back to expose the floor, and just started rolling on the adhesive like it was paint.  Within 15-20 minutes, the adhesive was on.  Let it sit for an hour until the glue is tacky, then carefully roll the floor onto the adhesive-laden underlayment.  Roll back the other 1/3 of the floor, roll on the adhesive, dry for an hour, and roll the floor back down onto the adhesive.

After the floor is done, you go rent your 100lb floor roller from Home Depot (about $20-$25), and roll from the middle out to the edges, both directions (north-south and east-west).

All in all, installing the floor was one of the faster and easier portions of the project.  We started around 9:30am, and were done by 2:30pm, and that included eating lunch, driving to get the floor roller, and waiting two hours for adhesive to dry.

What's next?  Believe it or not, it's time to start actually hanging cabinets!

Bonus Cat Picture - Actually shows the floor texture quite nicely

First cabinet installation!

Electrical, plumbing, and drywall done, ceiling painted, walls painted, floor installed...  The kitchen is now a blank canvas, ready for cabinets.  Hard to believe.

If you'll remember way back, early in the blog, we're adding a section of wall and base cabinets, and countertop to the north side of the kitchen.  36" wide, 15" wide, and 36" wide cabinets.  I decided to start here, since these cabinets are a straight run, and would be the simplest.  Start with the easy, learn how they install, then go on to the harder, main section.


I'm using one of our old cabinets, with a plywood top, as a temporary workbench of sorts in the middle of the kitchen.  It is working quite nicely, and beats working on the ground.

Sarah reminded the cabinet that it was temporary, and not to get used to it.


It is recommended to start with the upper cabinets, as the wider base cabinets aren't in the way at that point, and they're easier to install that way. I'm all for easier.  IKEA wall cabinets have a galvanized steel suspension rail, what appears to be somewhat like a french cleat system.  You screw the rail to the studs, and slide 2 special bolts per cabinet onto the rail.  Line them up, bolts go through the mounting holes in the upper left and right side of each cabinet.

I used Wall Dog cabinet mounting screws to mount the rail.  Each screw, when screwed into a stud, can support 250lbs.  The rail for these cabinets landed on 6 studs, so the rail should theoretically support 1500lbs worth of cabinets.


I ran into a slight snag in that my row of cabinets (4" filler, 36" cabinet, 15" cabinet, and 36" cabinet) was 91" long, and the rail was only 80".  Because of where the cabinets and studs lined up on the rail, it was simply a matter of cutting the rail in half, and mounting it with the rail gap between the mounting holes of the middle cabinet.  Each 40" section of rail screws into 3 studs, and supports 3 cabinet bolts (one and a half cabinets).  The hardest part was making sure both sections of rail were not only level, but level with each other.  I ended up sticking my 4' level tight against the first rail, and pinning it to the wall with a couple of nails.  Position the 2nd rail on the end where it needs to go, and screw it down.

Rail gap is hidden behind this middle cabinet.

Because the cabinets are flush against the wall on the right side, I wanted to bump them away from the wall to allow the doors to fully open.  Since the door panels are around 3 1/2" wide, I decided to use a strip of the toekick, which is around 4" tall, or in this case, wide.  I used a couple of L brackets, and mounted the filler strip to the side of the right-side wall cabinet.

Rear view of the filler mounted to the wall cabinet.
Front view of the filler strip.
Hanging the cabinets is as easy as picking it up, lining up the bolts with the mounting brackets, setting them on, and putting the nut on.  Once the cabinets are all hung, you line them up, clamp them, drill through one of the peg/hinge/drawer rail holes, and screw the cabinets together.  Tighten the nuts on the mounting brackets, and you're done!

The base cabinets were similar, minus the mounting rail.  In the toekick box is another unfinished long piece of MDF that you screw to the wall at 4 5/16" (A nice simple 11cm for you metric folks).  I took my time, because the more level it is, the more level your cabinets will be.  The back of the base cabinet rests on there, and the adjustable legs sit on the ground in the front.  In my case, our vinyl floor is Armstrong Cushionstep, and 1/8" thick.  The floor instructions say that the cabinet legs shouldn't be on the vinyl itself, so I marked and cut holes so the feet could sit directly on the underlayment.  The toekick will cover up the legs.

6th leg hole is not shown.
I used little 3/4" long wood screws to hold the IKEA feet on, since they're likely to fall off while moving the cabinet into place.  Then it's a matter of setting the back of the cabinets onto the rail, and adjusting the feet until it's level front to back, and side to side.

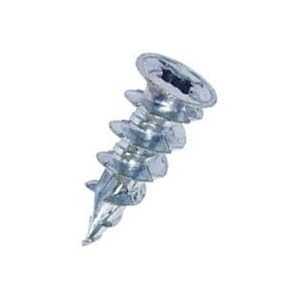
With the upper cabinets,  the rail had holes all along it, so mounting it to studs wasn't a problem.  However, with the base cabinets, none of the mounting holes lined up with my studs.  It's not a huge problem, as the weight of the base cabinets rests on the bottom ledger board, but you still want them secured to the wall as best as you can.  I used anchors similar to the following:

Screw those into the drywall through the mounting brackets, and then run your screw into that to hold it all in place.

Taadaa!
Monday night was the upper cabinets, and Tuesday night was the lower cabinets.  A couple more drawers and doors, a toekick, a countertop, side cover panels, a deco strip along the bottom of the upper cabinets, and cabinet lighting, and they'll be done!  Yeah, that's all.  Oh yes, and then the rest of the kitchen.  But we have cabinets!

Bonus cat picture of Charlie imagining she's a lot smaller than she really is.


Saturday, August 25, 2012

Underlayment Installation

Now that the old vinyl floor and underlayment were removed, it was time to get the new underlayment installed.  I bought 4'x8' sheets of 5mm Tri-Ply underlayment at Home Depot for $11 a sheet.  It's really nice looking wood, even just by itself!  I entered the kitchen dimensions into Google Sketchup, and figured out an ideal layout for the underlayment.  You have to stagger the joints, so you don't get 4 corners of 4 sheets of underlayment all meeting at the same point.  Also, you need the grain to all go the same way, preferably perpendicular to the direction of the joists.  I'm not sure if that would matter for me, since I have 1 1/2" of subfloor and underlayment already down, but it doesn't hurt to follow directions.  My stapling pattern was as follows: every 2" around the perimeter of each sheet, and every 4" across the face.

After the first night
So Monday, Tuesday, and Wednesday nights were spent measuring, cutting, and air stapling down underlayment.  Of the 9 sheets I bought, only 2 needed no cutting to make them fit.  I went the ultra-cheap route with the stapler, I picked one up from Harbor Freight.  It was on sale, and I had a coupon, so it was $16 out the door.  I did buy good quality Porter-Cable staples, per the recommendation of those on the Harbor Freight website.  How did the cheapo air stapler fare?

Underlayment?  More like DONEderlayment!

9 sheets of underlayment, 10 hours of cutting and fitting, and 2975 staples later, and only 1 misfire.  I hesitate to even call it a misfire, as I think I actually managed to hit a nail underneath whose head was broken off and then hammered below the surface.  I can't complain!

With the underlayment down and the walls painted, we wanted to see how the new floor would look with the baseboard and wall.  We rolled out the small roll of flooring and stuck a piece of baseboard against the wall.

Soon, it will all look like this...
 Also, wanted to see where the cabinets sat, so we knew where to cut the flooring.

Oops, I need to take care of that old phone jack hanging from the wall.

And since Charlie is finally allowed back in the kitchen, how about a return of the Bonus Cat pictures?

Flooring Roll Inspector Cat
The roll of flooring was the only thing in the kitchen, so of course she had to lay on  it.

Next up?  Cutting and installing the new floor.  No, that wont be scary at all!

Monday, August 20, 2012

Ceiling and wall painting, final floor prep

Short blog entry this time around.  Is there much that can be said about painting?

Friday night, we painted the ceiling.  We used Zinsser ceiling primer and paint in one.  I figured since we already primed the ceiling, and it started white to begin with, a second coat of primer/paint in one would be equivalent to a second coat.  The paint goes on slightly pink, so you can see where you've already painted.  Slightly is probably an understatement, as the pink was so faint that it was very, very difficult to see where you'd already painted.  The glare from a light ended up being a better indication of what was painted and what wasn't.

Saturday morning, we started on the walls.  We went with an eggshell finish of Behr Seasoned Salt.  We didn't tape along the ceiling, we just painted it in by hand.  I think that ended up being far superior, as every time I've tried taping off areas, even with the good tape, paint ends up underneath it.  That, and tape is ridiculously expensive.

Immediately after the first coat, the paint looked terribly uneven.  However, as it dried it evened out.  We put on a second coat that afternoon.  It seems like no matter how careful you are with one coat, your roller still ends up missing in spots.  The large white areas will be covered by tile and cabinets, we're not that inept at painting.


Sunday, I removed the final 70 or so nails that were embedded all wonky in the floor, presumably from the chisel passing over them and knocking them flat.  I scraped the ridges off the nail holes, and put down floor patch to level out areas where the previous linoleum had been chipped up.  That stuff stunk bad while drying.

Next up, cutting and fitting the underlayment!

Wednesday, August 15, 2012

Final drywall prep and priming

With the recessed lights in, and the final layer of drywall mud applied, it was time to get the joints sanded and smoothed out. 

Knowing how much of a mess construction can be, particularly drywall dust, we've had temporary plastic sheet "doors" installed in the 2 doorways leading to the rest of the house.  In addition, I saw great reviews on Amazon for a product called Sand & Kleen.  Basically, it's a special sanding head (uses regular sanding screens), hooked to a hose that's hooked to a bucket of water, that's hooked to another hose going to your shopvac.  Drywall dust gets sucked into the the bucket of water where around 95% of the dust ends up as sludge in the bottom of the bucket. 

Supposedly, if you're good at drywall, you have to sand very little.  Unfortunately, I'm not.  I did the majority of the "heavy" sanding with the Sand & Kleen, and it captured the vast majority of the dust that came off the walls.  Even with my little 1 gallon Shop Vac, it was strong enough to keep the sanding handle stuck to the wall.  I emptied the 3 gallon bucket twice, each time it had about 3/4" of solid sludge on the bottom. 

Here's a cool panorama of our kitchen post sanding.  There's some weird artifacts from stitching the individual pictures together.

I did the final smoothing with dry sanding sponges, so there was some dust there, but not nearly as bad as it would have been.  Once it was done and cleaned up, and the existing painted walls scuffed (for better paint adhesion), it was time to prime.

Priming was scary to me.  Not being skilled in drywall, priming to me has the finality of, "all of your mistakes in the drywall will be forever displayed here."  In particular, the U-shaped area of the ceiling where I got "lazy" and just filled in the missing areas from the soffit, rather than pull the whole ceiling down and deal with the mess of insulation.   I suppose if it was really that bad, I could go back and do another layer of drywall.  Thankfully, I think it came out pretty good.


The mold resistant drywall behind the sink took 2 good coats of primer.  I used Zinsser 123, which according to the can, would stick to just about anything.  After getting paint on my hands and trying to get it off once it dried, I believe it.  All told, it took about 1 3/4 gallons to prime the kitchen walls and ceiling. 

Next up is painting.  Our color is Seasoned Salt from Behr, which oddly isn't on their website. 

Saturday, August 11, 2012

Recycling and Recessed Lighting


As the project has continued, I have been saving any scrap metal that could be recycled.  This morning, I decided that I wasn't going to be removing any more recyclable metal, so I took it down to the local recycling facility. 


They don't pay for steel, but they do pay for aluminum (I had 12 pounds), brass (1 pound), copper (24 pounds) and stainless steel (15 pounds).  I was expecting maybe $20, so I was quite happy to leave with a check for $62.43!  On the way home, I swung by Harbor Freight for a cheapie air stapler that will hopefully last me at least long enough to put the new floor in.

With the old floor removed, and the drywall continuing, I needed to address another large part of the project looming over my head, quite literally:  lighting. 

In the old kitchen, we had one recessed light over the sink, one hanging pendant-style light over the table, and two old and ugly ceiling lights.  We replaced the sink recessed light with a new one, and were planning on removing the two ceiling lights and replacing them with four recessed lights, and replacing the existing pendant with a different pendant light. 

For the recessed lights, I knew I didn't want incandescent.  I wanted compact florescent or, preferably, LED.  Menards ended up having a sale on their LED recessed retrofit bulbs, which is an LED bulb and trim ring, in one. 


They look very nice, have a soft white light, and are surprisingly bright!  5 year warranty, and they're dimmable, even better still.


After finally figuring out how the bulb unit was supposed to mount in the recessed light (duh), we determined that they're bright enough, we thought we could get away with two recessed lights replacing the two ceiling lights.  And, rather than a pendant light over the dining room table, it might be nice to have a "clean" ceiling, and use a recessed light there instead.


I was quite happy about that, as it meant I was able to re-use the existing holes (after enlarging them), and not have to fish any new wire in the ceiling.  It also meant I was able to return two LED units and recessed lights, saving a couple dollars.

One of the old ceiling lights was mounted with a ceiling fan hanger, so I did  have to go up into the attic and rip that out, unfortunately.  Other than that, the recessed lights (remodel style) went in rather easy.  Pop the LED kits in, and other than the under-cabinet lighting, my lights, and more importantly, the electrical, is DONE.

Friday, August 10, 2012

Floor removal - Done

After a few more hours of work Tuesday night, the last of the nails were removed from the floor.


  • 48 hours of total work to remove
  • ~200 square feet of underlayment
  • ~15 minutes per square foot
  • 18.5 pounds of nails
  • 324 nails per pound, that's ~6,000 nails
  • 30 nails per square foot

I'm pretty sure the installer got paid by the nail.

Wednesday, we went to pick up the underlayment and the flooring.  The rolls ended up being a lot smaller than I expected.


That's the large roll, 12' wide by 23' long.  The new 4x8 sheets of underlayment are on the right side of the picture.  The old underlayment is that pile on the left.

Because all we had seen was the small in-store sample, we were eager to see what the floor actually looked like.  We unrolled the small roll (12' x 6'), and are very happy with how it looks.


Like most of the work I've done in the kitchen, it's stuff I've never done before.  Flooring is no exception.  I was very intimidated to work with such a large roll, and really, really didn't want to mess up installing the floor.  The manufacturer calls for S-288 adhesive, or S-289 releasable adhesive.  Doing some research, I found that the releasable adhesive has an "unlimited working time".  Meaning, you roll on the adhesive, let it get tacky (45 to 60 minutes), put your floor down, and go over with a 100 pound flooring roller.  Didn't get the position right?  Pull it up, it's pressure sensitive.  Don't like the floor in 10 years?  Pull it up, it's pressure sensitive.  I guess it's primarily used for apartments, where tenants move out and new floors get put down on a semi-regular basis.  It seems like it will work great for me, a novice floor installer.  As popular as Armstrong Flooring is, and as many places there are that sell it...  very, very few places sell the adhesive.  Once I tracked down someone that actually sold it (The Andersons General Store) and saw how much the adhesive costs, my guess is it's because other companies adhesive is much cheaper.  $60 for 1 gallon!  Home Depot sells another manufacturers adhesive for $27 per gallon, but their adhesive doesn't cover as much area ("up to 190sq ft" for the Home Depot vs "250-325 sq ft" for the Armstrong), and would have required 2 gallons.  6 of one, half dozen of the other...

Thursday night, I did another coat of drywall, this time with a 12" knife.  It's looking pretty good at this point, I'll probably sand the walls and be done with them, but do one more coat on the ceiling to get a better old ceiling/new ceiling match.

Tuesday, August 7, 2012

What lies beneath...

It has been about a week and a half since the last blog entry. I was in the middle of drywalling, and since I knew the floor we were ordering (Armstrong Chamblis 2 Slate Block Bronze, if you're wondering) would take 2 weeks to arrive, I thought, "We should order that so I'm not sitting around after finishing the drywall."

Ha.

So Sarah and I go to Home Depot to order the floor. The rolls are 12' wide. Most of our kitchen is around 11' wide, but there's a small section 5 1/2' long that's about 13 1/2' or so.  2 feet of that 5 1/2' will be covered by base cabinets.  Unfortunately, to ensure proper seam/matching/whatever, we had to order 6' x 12', or 72 square feet extra, to get the ~6 square feet we'll need.  Awesome.  At least we'll have enough extra to do the mud room (maybe) or bathroom.  Someday.


Old floor.  Ugh.
New floor.  Oooo.

So we order the floor, and the salesperson, who used to own a flooring company with her husband, asks if it'll be going over the existing floor.  We said no, we would be removing the old vinyl floor, we didn't want the increased height.  (Apparently you can put new vinyl over old vinyl, but we didn't want to do that.)  "You're going to need to replace the underlayment."  Huh, okay. I naively assumed that I could pull up the old vinyl floor, scrape the old glue off, put new glue on, and reuse the underlayment (1/4" plywood).  So we finished our order, went over and looked at the underlayment.  Not bad at all, $11 for a 4x8 sheet, and it looked nice and good quality.  All we had to do was rip up the older underlayment, and put the new stuff down.

Ha.

I go home, rip up a bit of the vinyl, and realize I probably never could have scraped/sanded/whatever to reuse the old underlayment.  Remember, totally naive about floors.  Then I started prying up the old underlayment.  

Huh.  (No ha this time.)

It seems that the floor is a sandwich, starting at the bottom, of:
3/4" plywood sub floor.
3/4" plywood underlayment.
Quite thin super groovy original 1964 linoleum floor.
1/4" dry and splintery plywood underlayment.
Early 90's vinyl floor.

This wouldn't be a problem at all if the installers of early 90s floor had installed the underlayment like normal people, and not the evil, spiteful people they were.  The 4x8 sheets of underlayment are nailed every inch around the perimeter, and every 2" across the sheet itself.  Every inch around the perimeter of a 48x96 sheet would be...  288 nails.  Every 2 inches across the reset of the sheet would be, ignoring the perimeter rows, 22 rows of 46 nails each...  Over 1000 nails there.  Almost 1300 nails total for each 32 square foot, 4x8 sheet.  I just spent several minutes checking my calculations, and even after all the work we did, that still seems like an excessive number.  Someone please correct me if I'm wrong.  Assuming the calculations are correct, taking into account the 2' where there was no floor under the old cabinets, that's still almost 200 square feet of flooring...  Approximately 7200 nails.  We're saving them and going to weigh them to get a better estimate.  

It gets better.  They're not wimpy little nails.  They're nice, 1 1/2" ring shank nails.  And the best part of all?  Removing the nails is the easy part!  Yes, that's sarcasm.

The nails are so close together, that it's difficult to get anything under them to pry up the wood.  A pry bar or chisel will occasionally work, but usually, the wood just shreds.

Evil, evil floor installers

I realize after an hour, that I don't have to worry about sitting around idle while we wait for the floor to arrive.

Little by little, the underlayment goes away.  Tuesday night by myself.  Thursday night with Sarah.  Friday night with Sarah.  Saturday all day with Sarah and her dad.  After 34 man-hours of work, this is what we had left:


The rest of Saturday and Sunday were periods of pain and rest.  Monday night, after another 10 hours of work (3 people, 3+ hours each), we're done ripping all the old underlayment up.  44 hours total.  Another 2 hours of prying up nails, and our floor will be clean and ready for the new underlayment.

Wouldn't you know it, I got a call from Home Depot this morning, that our floor is in.  Pretty good timing.  Just have to get the old floor debris moved/cleaned up first, before I can get the new floor in the garage.

This was taken about halfway through the floor removal, so the pile is larger now.

When I install the new underlayment, I'm going to staple it every 2" around the perimeter, and 4-6" across the rest of it.  I wont be evil to the next people who tackle this floor.  Once that's done, we'll install the floor, prime and paint the walls, and then be ready for cabinets...  Getting there!